Create Your First App
This quickstart uses an “AI Pictionary” game to walk through one complete creation. It covers only the shortest path; later guides explain each step and its rules in more detail.
If you are not signed in when you start creating for the first time, Eazo opens the sign-in window first. After signing in, you can continue on the same page without creating an extra App.
1. Describe your idea
Enter this on the creation home page:
Create an “AI Pictionary” game. The player draws on a canvas while AI guesses what the drawing is, and the player earns points for a correct guess. Make the interface lighthearted and fun, with mobile as the primary layout. Before building, give me three design directions to choose from.
You do not need to specify every detail at once. Start with the purpose and the most important feature.
Browse examples below the input under Play, Design, 3D, Tools, Spark, Audio, Video, or Images. Selecting an example fills the input with its full prompt so you can edit it before sending; use Refresh to see another set. Audio examples cover voiceovers and narration. Video examples cover both Apps with video generation capabilities and finished product launch films, motion graphics, and animated explainers. Images examples help you create Apps with image generation capabilities. Each Video batch mixes three App examples and three film or motion examples; Refresh replaces all six.
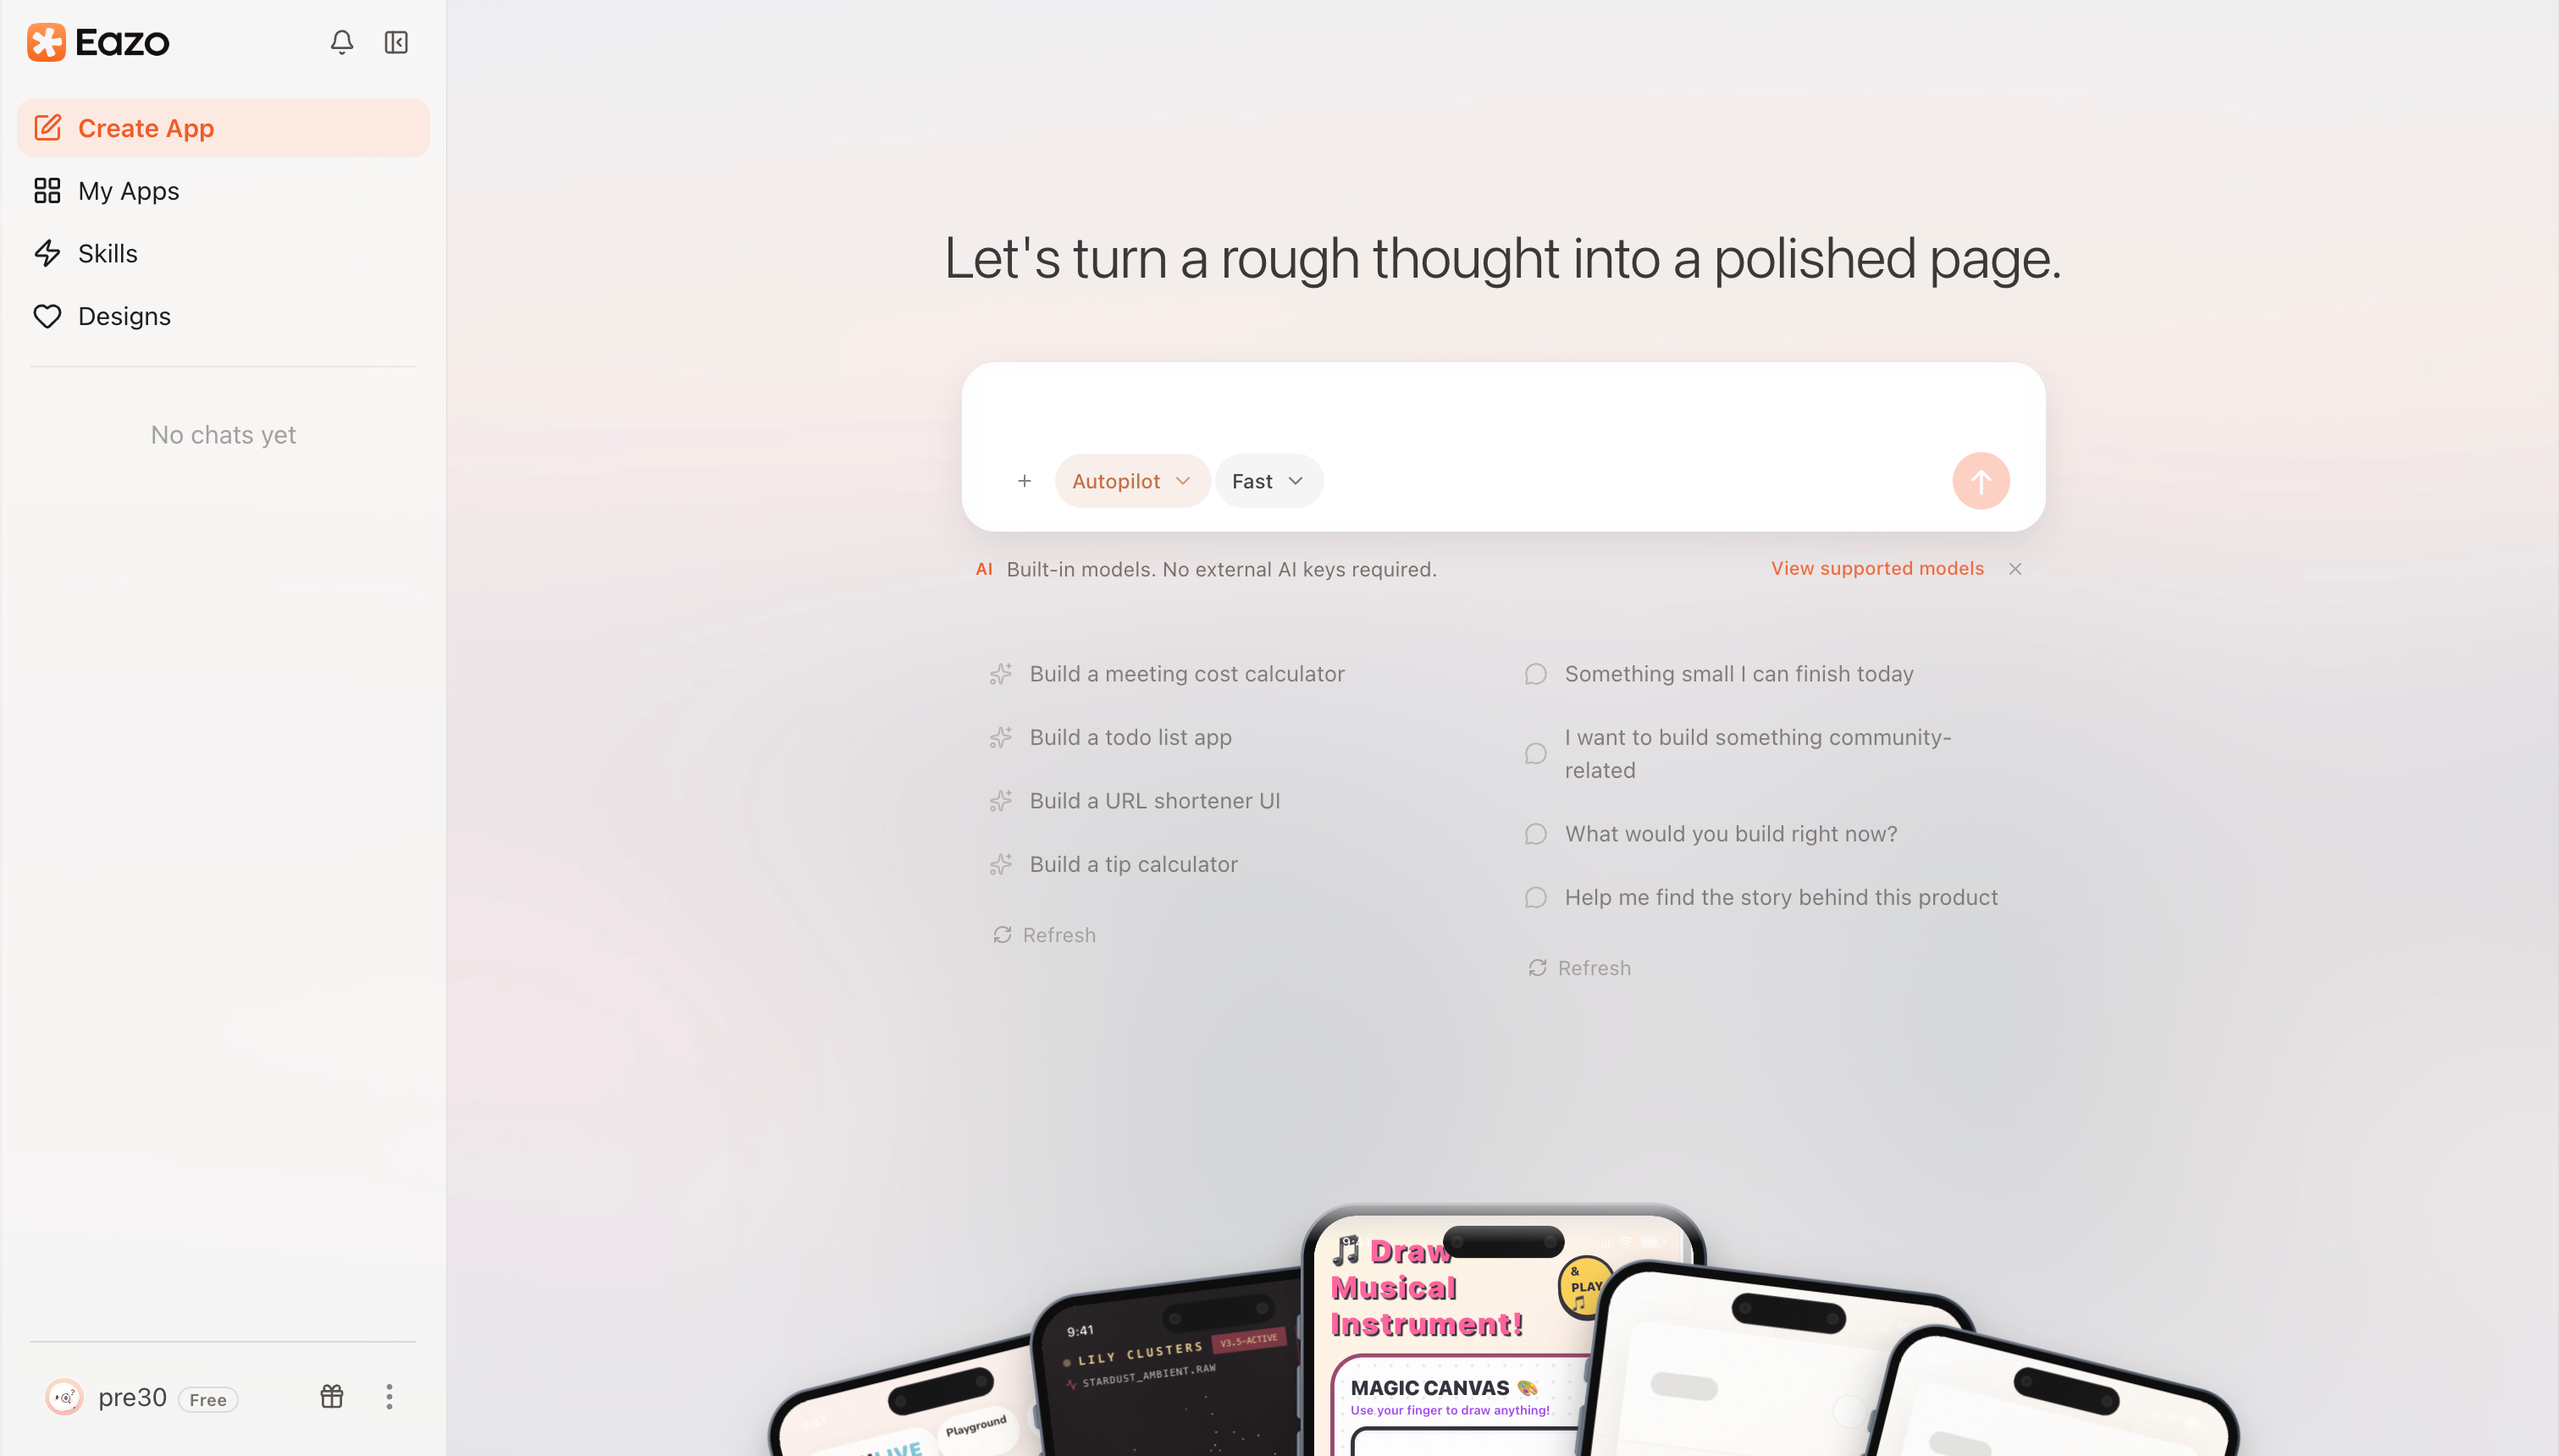
Describe your idea in the input on the creation home page. Examples and other starting points appear below it.
2. Confirm the product scope
If an important detail is still undecided, the Agent first explains its current understanding and assumptions in Chat, then displays a compact confirmation card above the composer. Read the explanation, choose an answer, or type the adjustment you want.
If no confirmation card appears, the information you provided is usually clear enough to proceed.
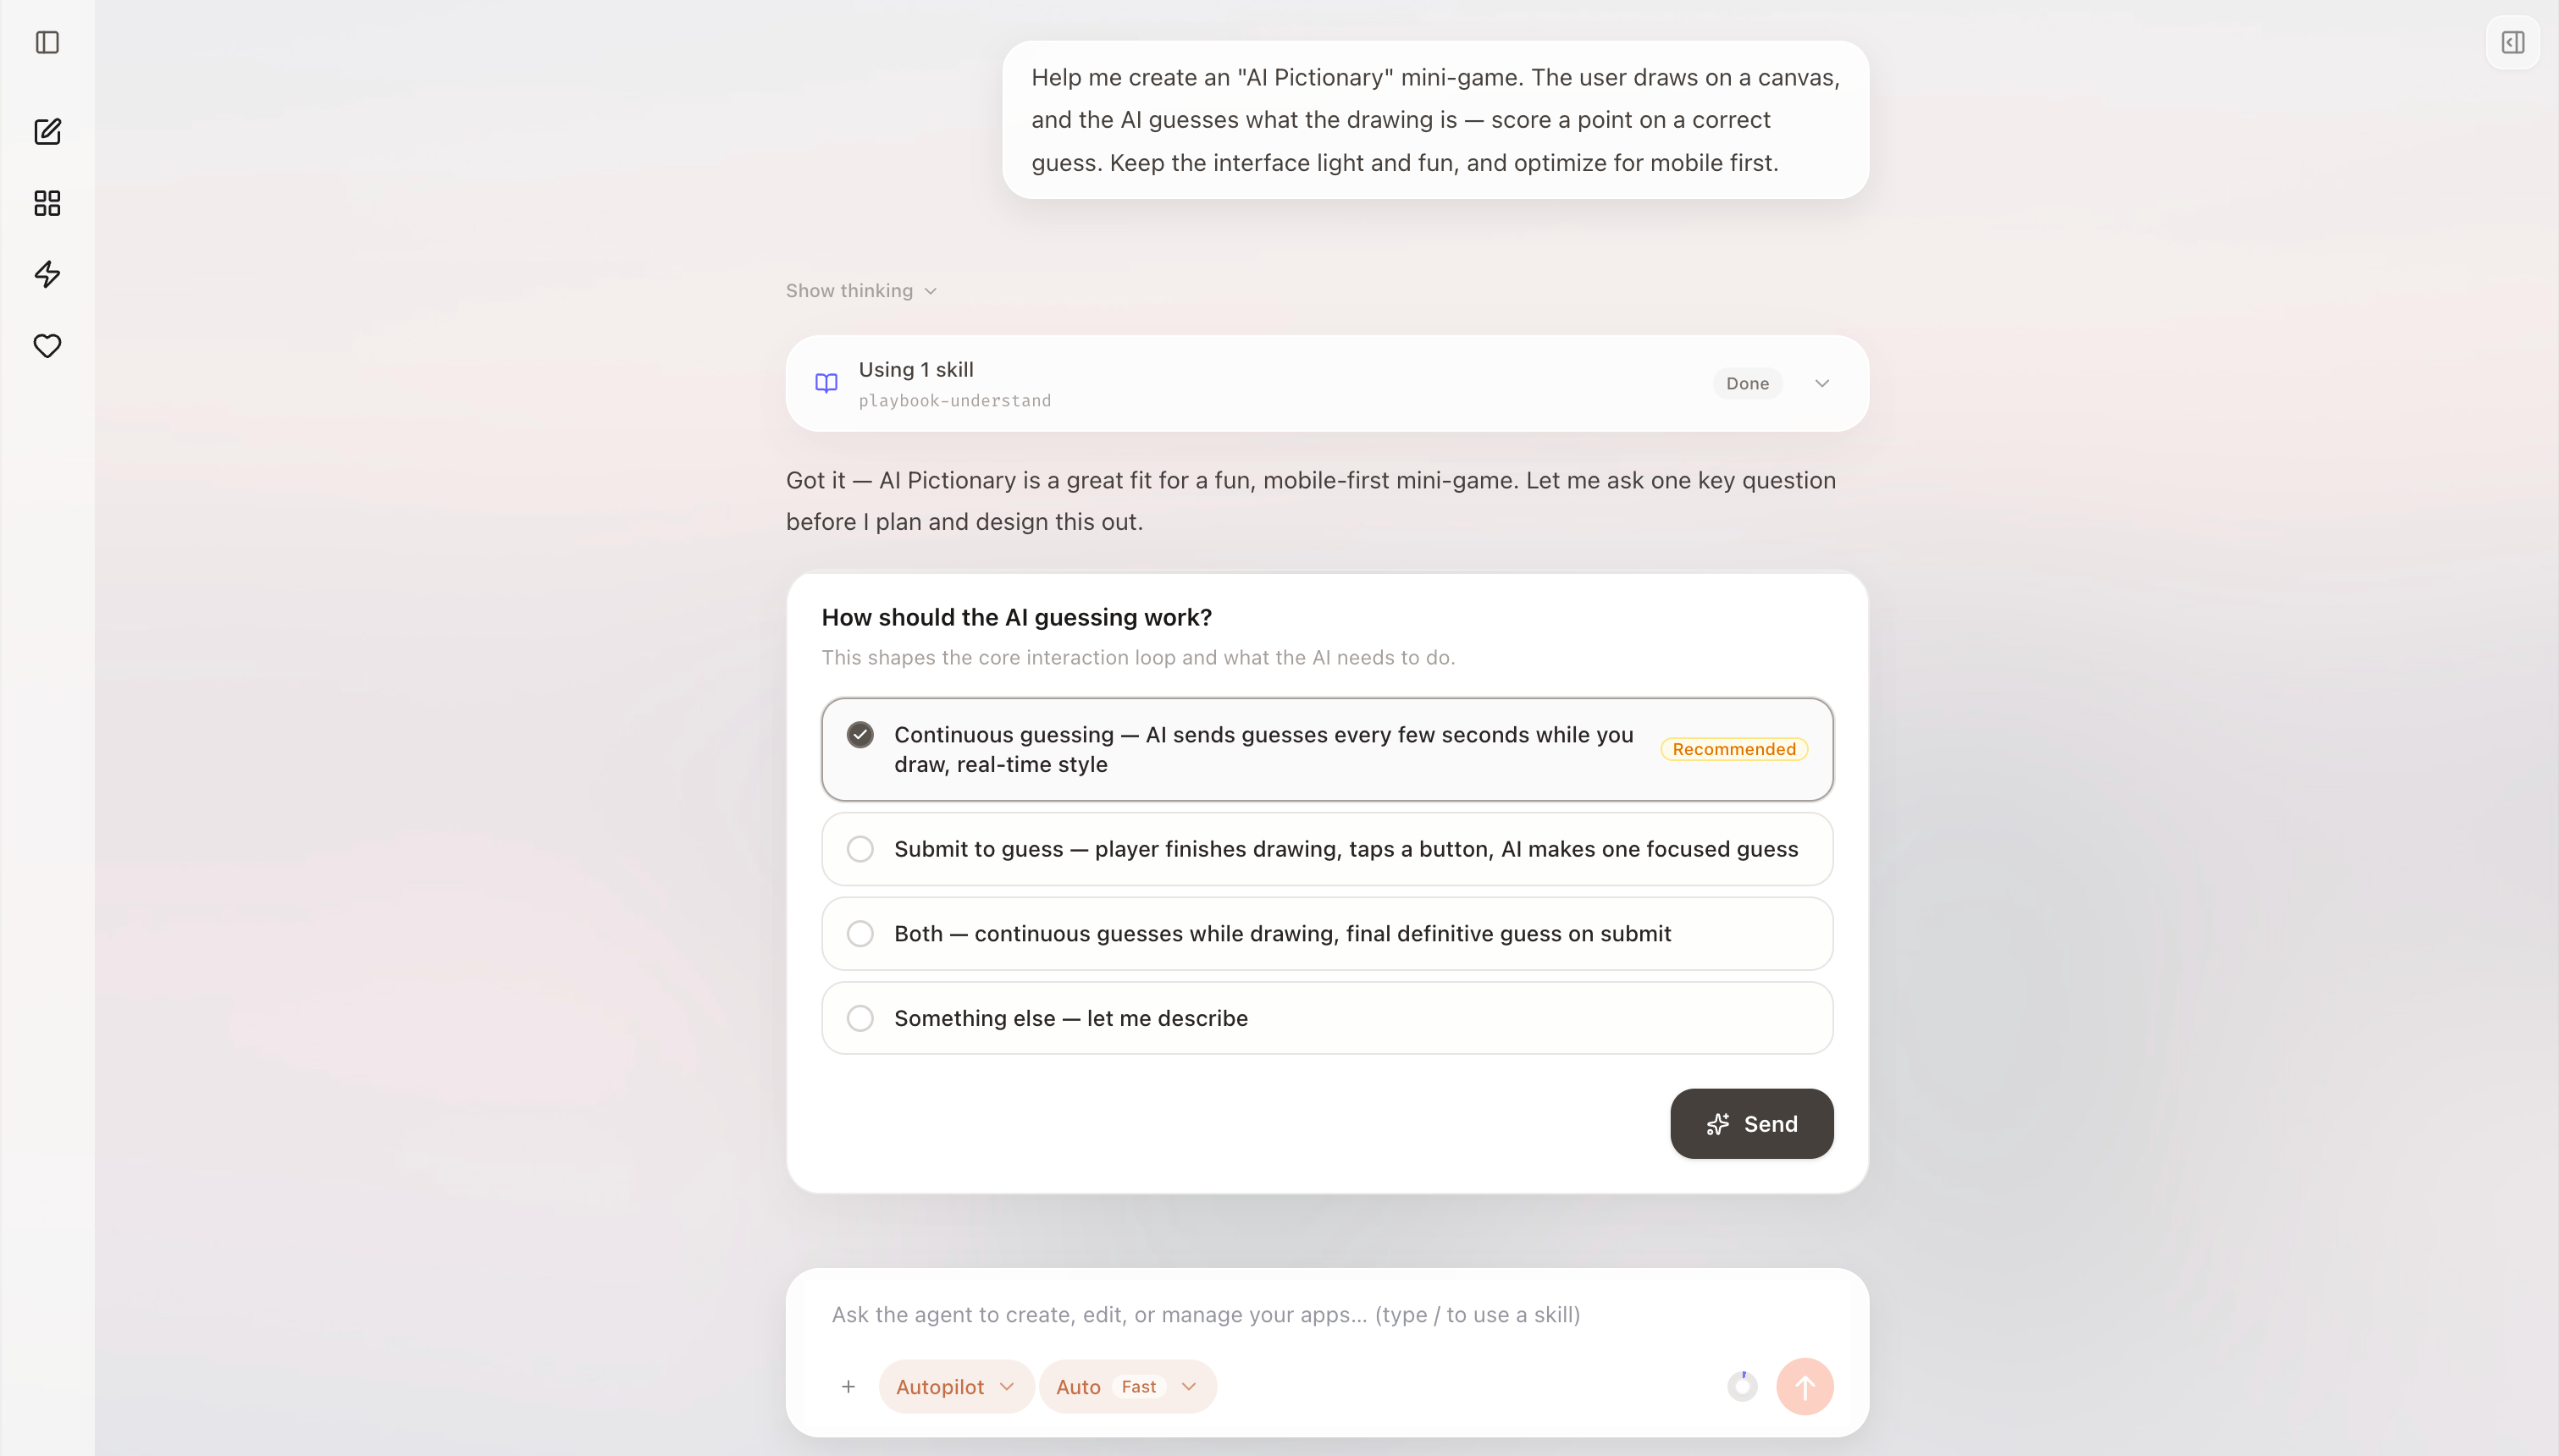
The Agent explains its current understanding in Chat, then collects your decision through a compact card above the composer.
3. Confirm the product plan
After the scope is clear, the Agent usually performs a quick review of related products and saves the overall product plan in the Project's Docs. Check the target users, core flow, competitor strengths and weaknesses, and the boundary of the first version. Use the confirmation prompt in Chat to continue, or submit feedback to revise the plan.
4. Choose a design
Review the design directions from the Agent and select the option that best matches your expectations.
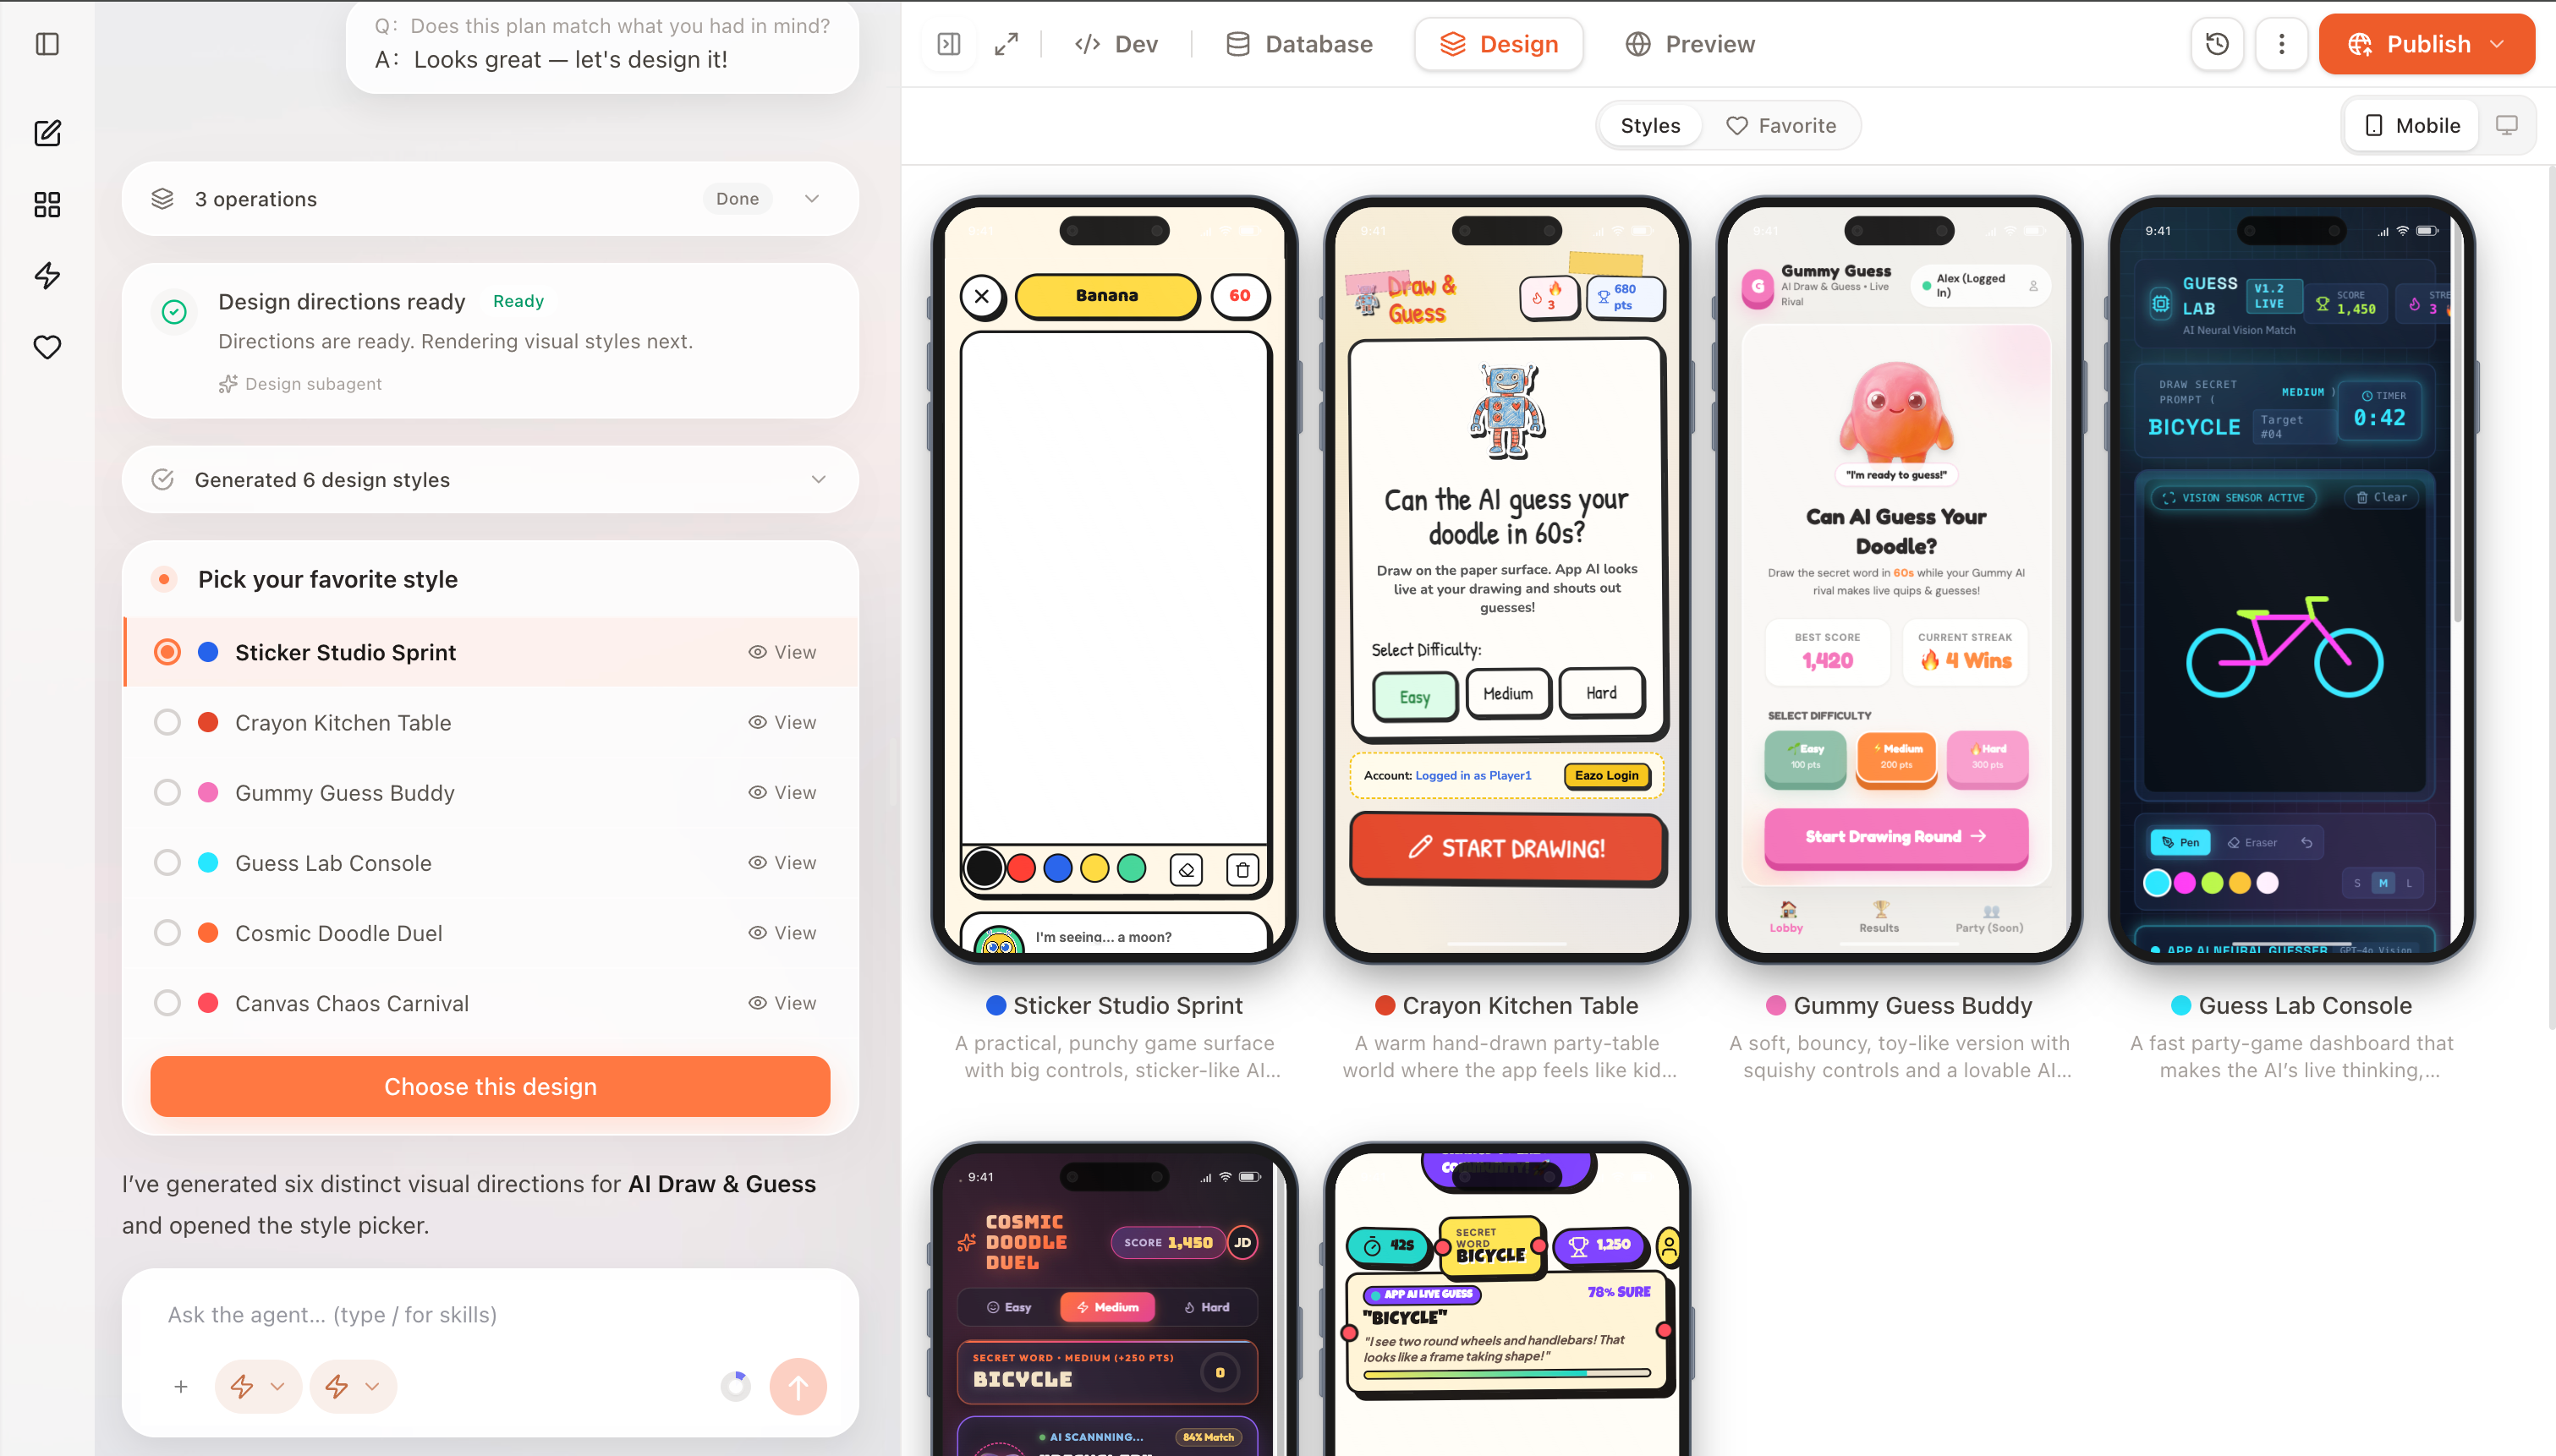
Choose one of the design directions. Eazo then generates every frontend page in that style.
5. Build the pages
After you select a direction, Eazo generates all frontend pages in that style and displays them together so you can check completeness and consistency. These are frontend pages, not yet the complete App; data persistence and working features are added in the next step. You can select elements or request changes in Chat, or continue immediately.
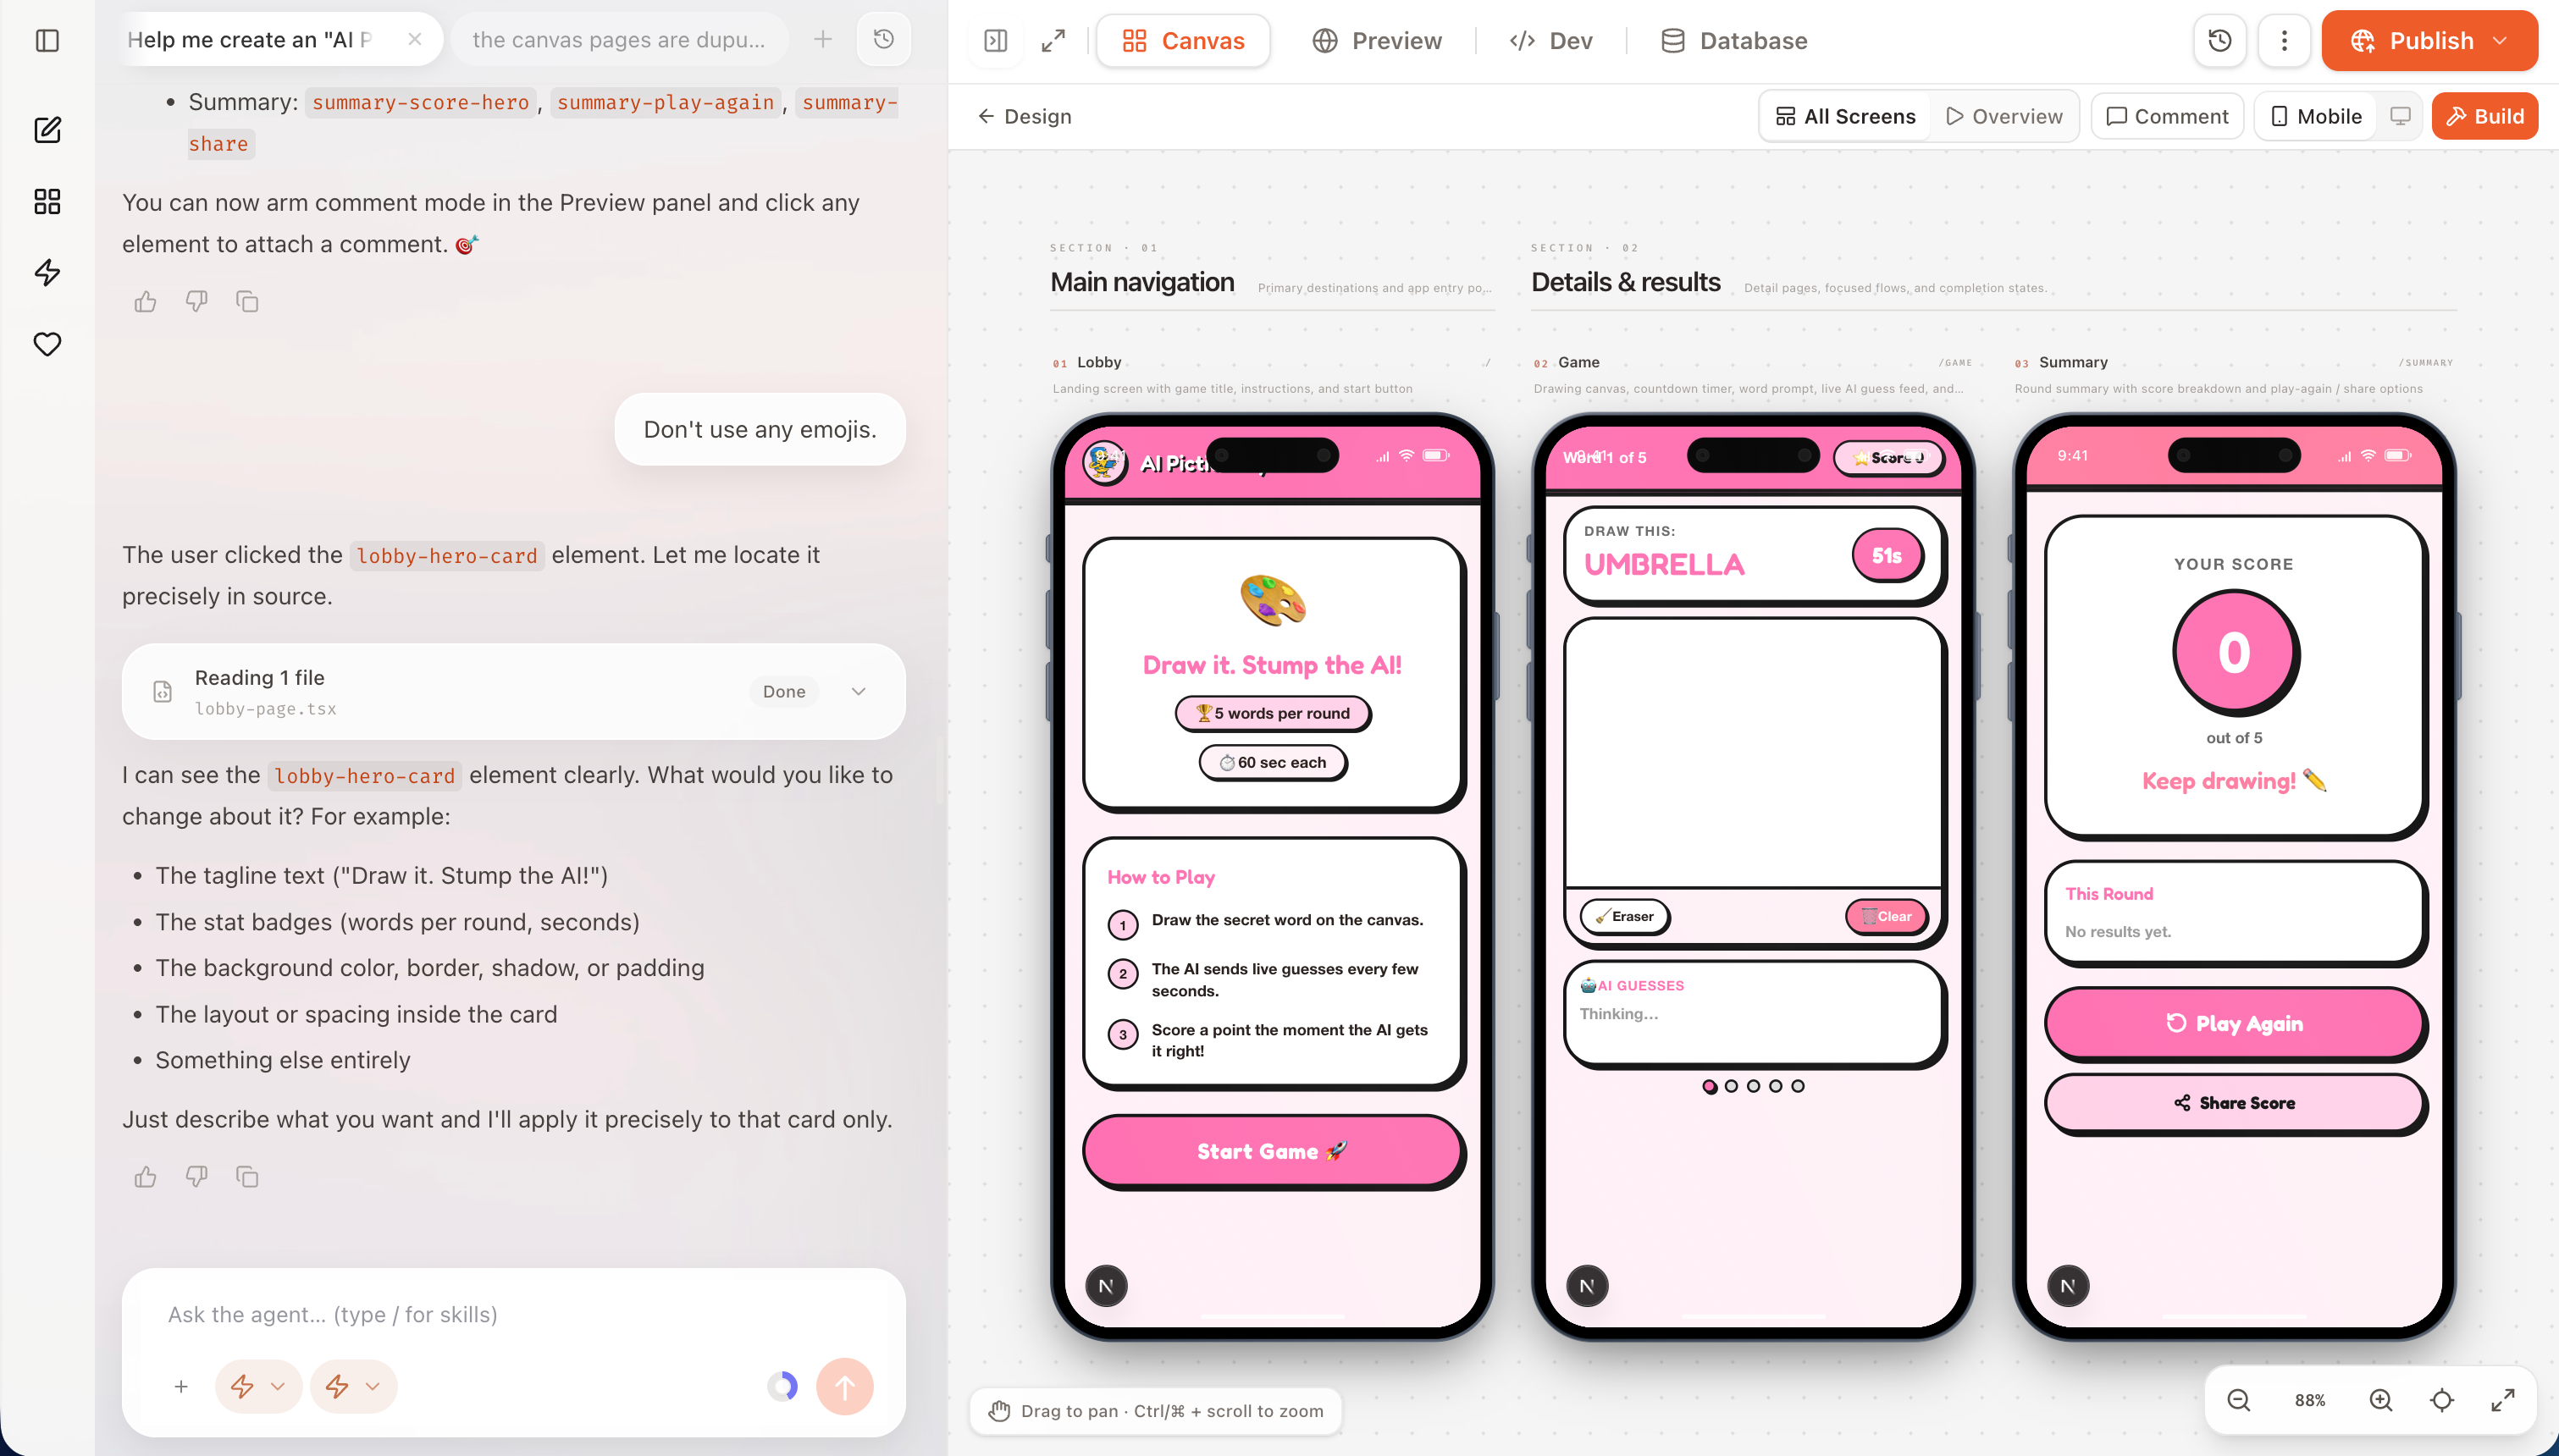
After you choose a design, Eazo generates all frontend pages in that style so you can review completeness and consistency.
6. Build the complete App
When the pages look right, click Build in the upper-right corner. The Agent generates the project files, connects the necessary capabilities, and prepares the preview. You can follow its progress. To change direction, enter and send a new request; this interrupts the current task.
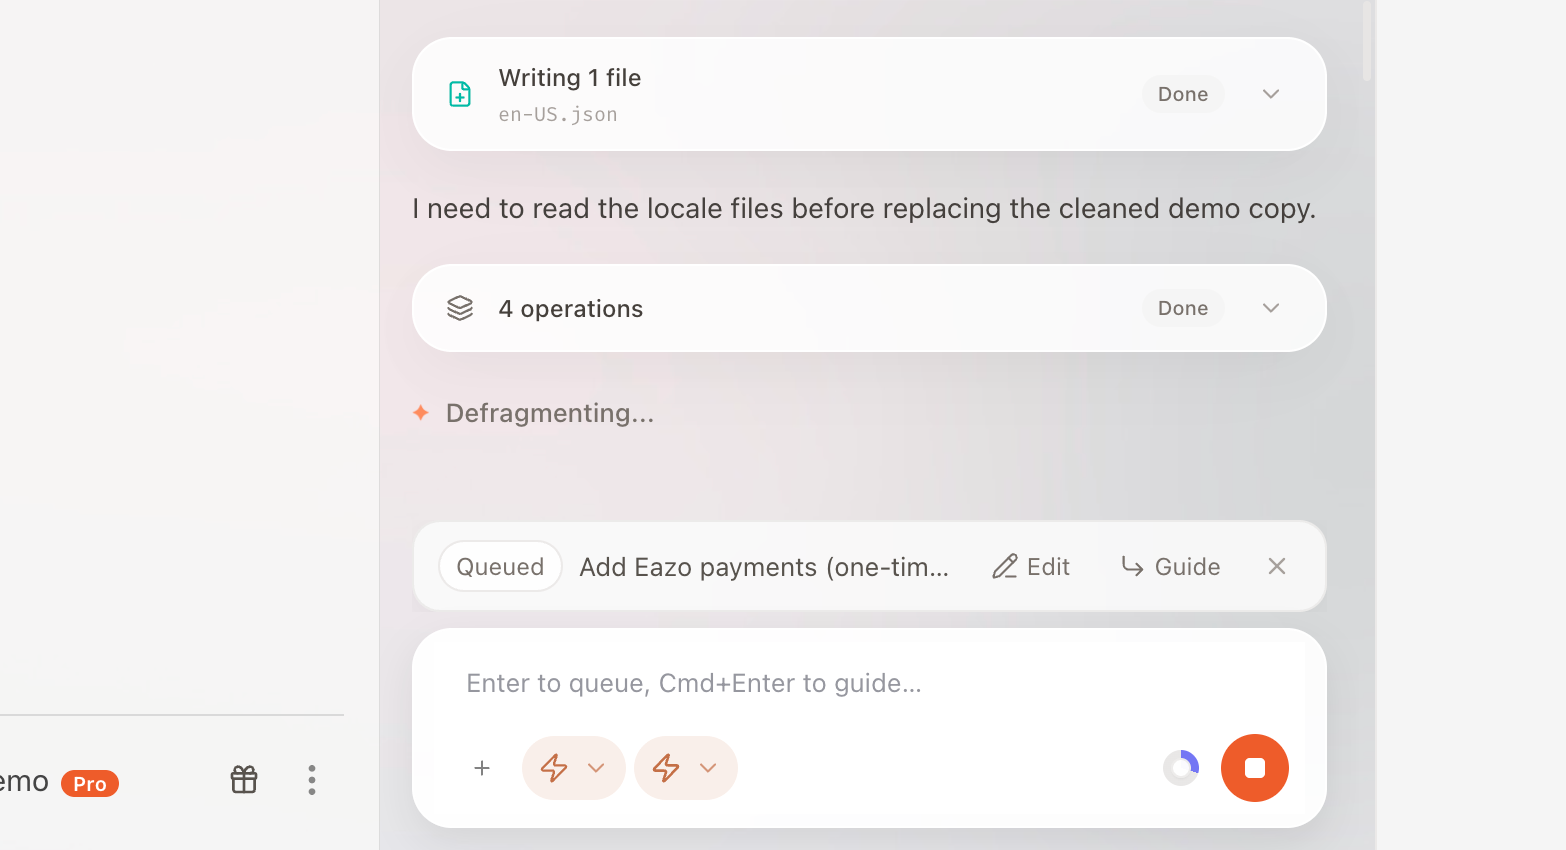
Follow the current build step, or send a new request to change direction.
7. Review and revise
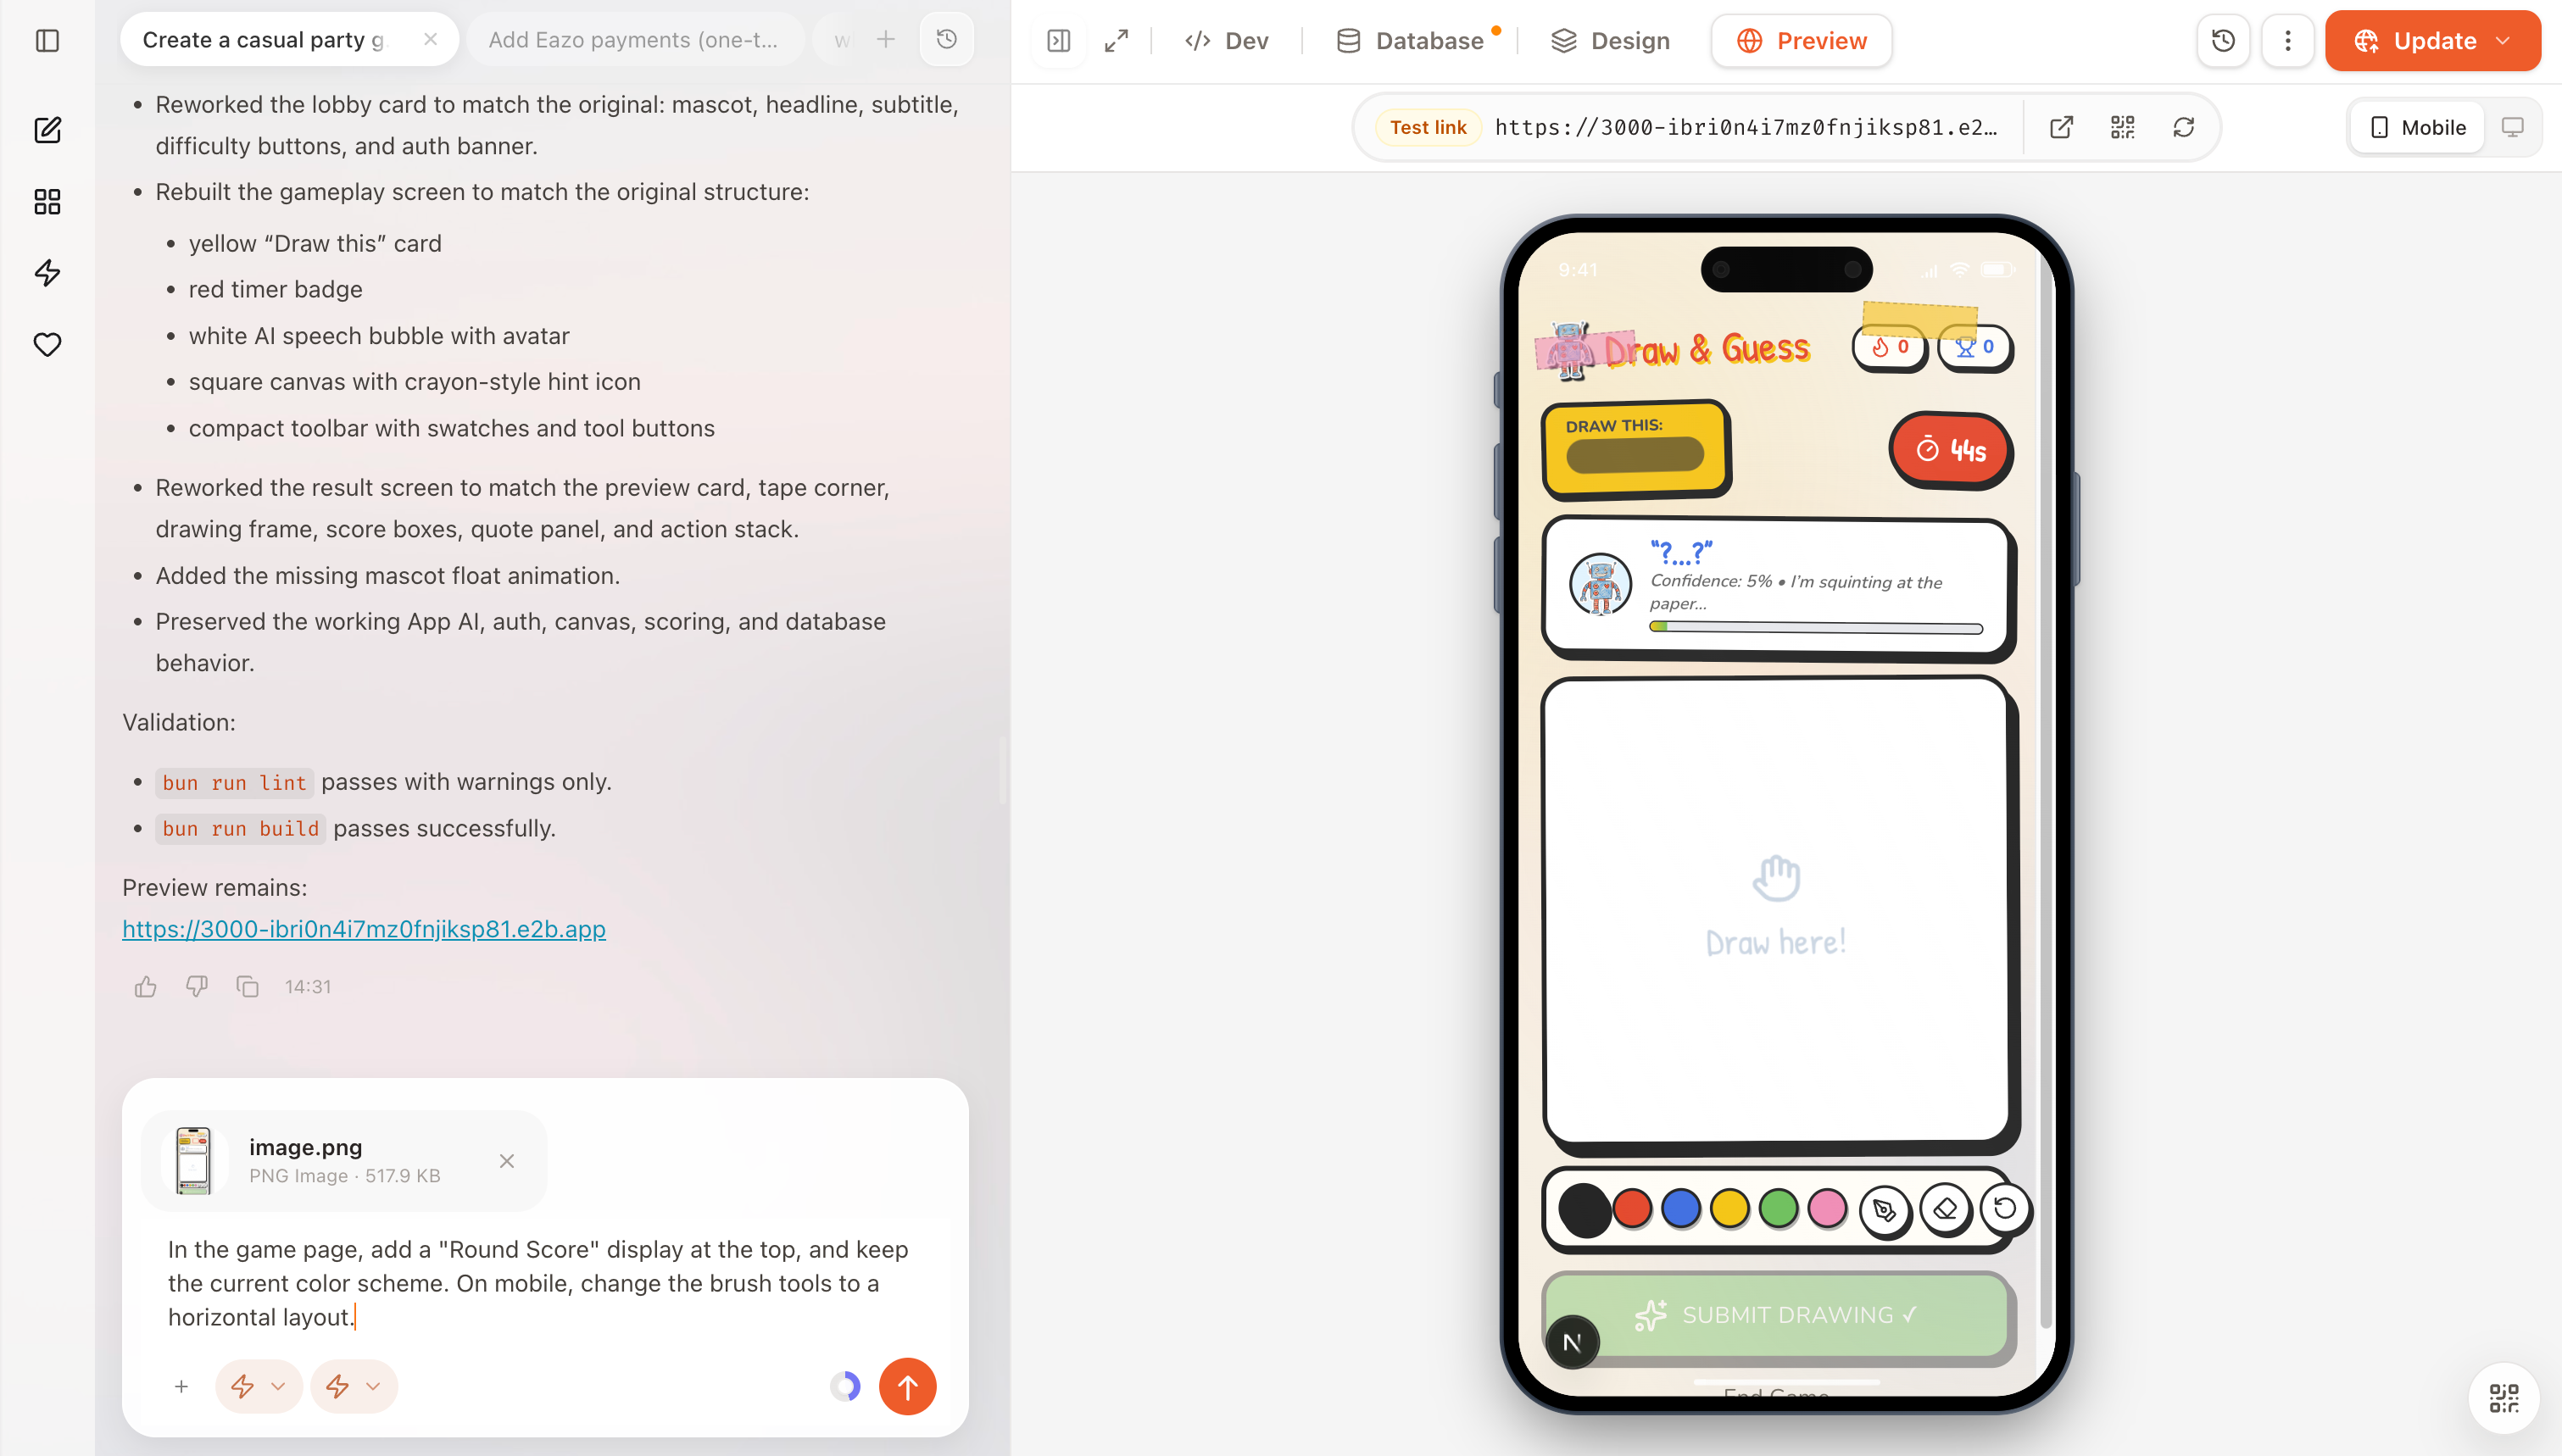
Complete one core flow in both phone and desktop views. When you need a change, identify the page, location, problem, and desired result. For example:
Add “Round score” to the top of the game page and keep the current colors. On mobile, arrange the drawing tools horizontally.
8. Publish the App
After confirming that the core features work, click Publish and complete the App information and visibility settings. Publishing gives you a production link and QR code.
After making further changes, update the published App again before visitors can see the new version.
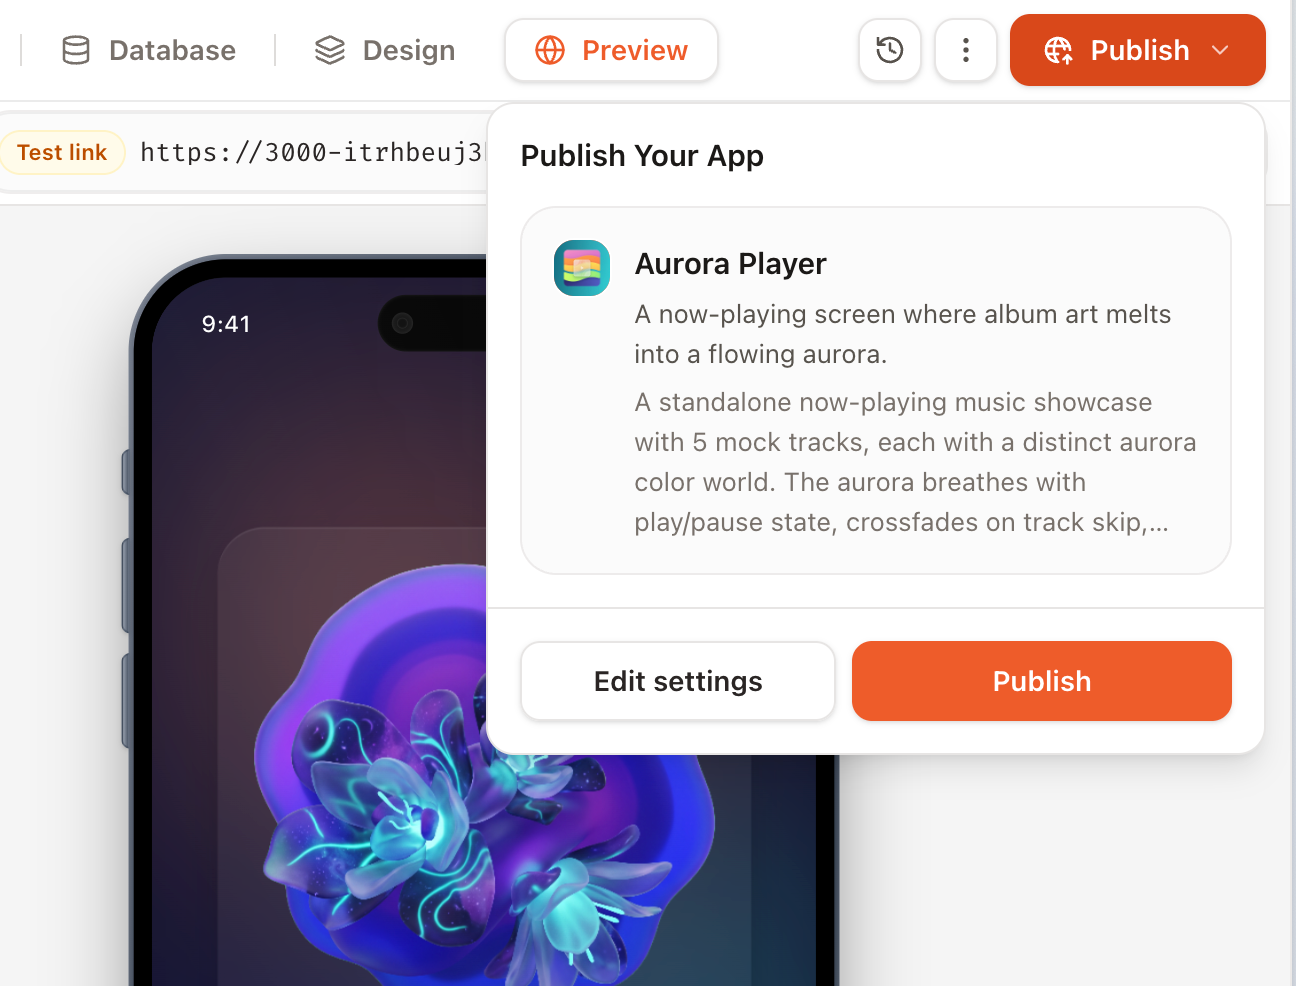
Click Publish, enter the App information, choose its visibility, and submit to receive the production link and QR code.